Wednesday, September 3, 2008


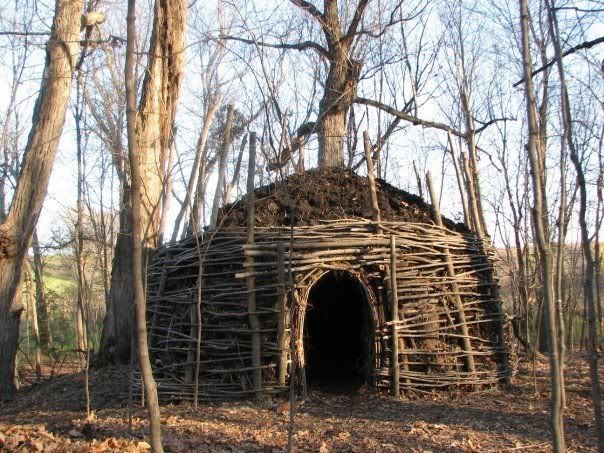
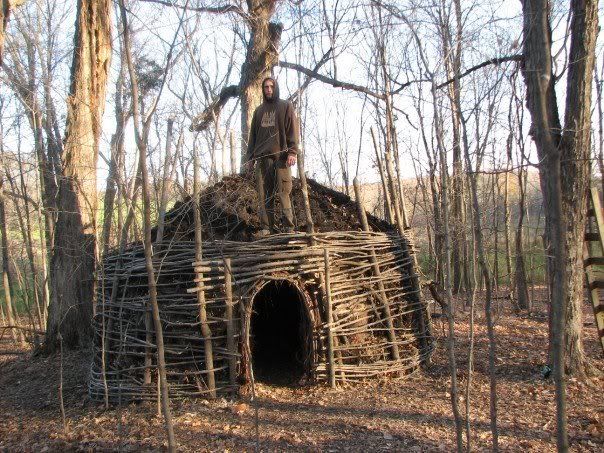
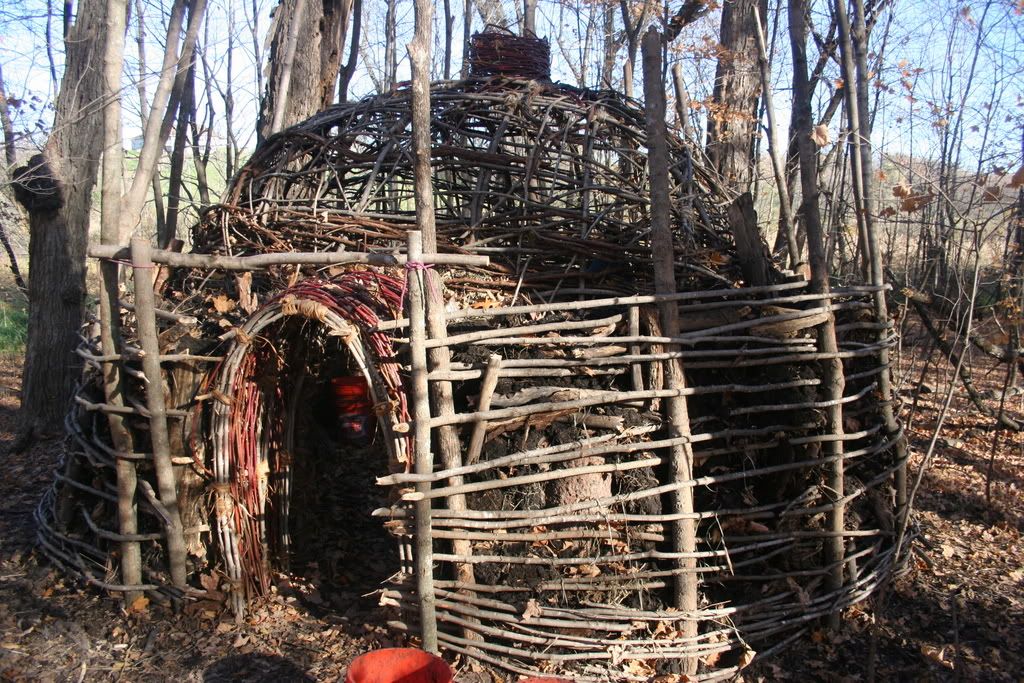
The summer months have brought alot of beautiful growth to the hut! The top is now covered in a nice carpet of jewelweed. There are quiet a few spots that could use some work, on the back side of the hut where the walls are at a much steeper incline there is a large spot where the dirt has slid down. I didnt get much or a chance to work on it this summer but Derik is plannin on living in it during the fall so im sure it will be home sweet home in no time. I recently moved up to the north woods of Wisconsin, so i wont have anymore pictures or a whole lot of info about the hut but i do plan to find a good spot and start another project in the months to come. In the mean time ill just be messing around with some fire kits and my new bowl.

- nick

Wednesday, October 31, 2007

Theres no place like home...

Yesterday i made it out to the hut to a very nice surprise, the fire pit was all dug, the first layer of pine needles were down, and all we were waiting for was some wood for the lodges first fire. It was amazing to see how quickly it got warm inside, and how long it stayed warm. The chimney worked like a charm, all the smoke was able to donut out and it stayed nice and clear inside as long as you kept a flame burning. The last few stages are just going to be making it more comfortable and patching a few spots where light still peeks through.

Tuesday, October 30, 2007

FINISHED

The final buckets of mud got put on yesterday afternoon and it looks simply amazing! I'll be going out to take more photos and start digging the fire pit and doing all of the other little tasks that need to be done.

Monday, October 29, 2007

The Floor plan


Here is the basic floor plan of the hut. The inner circle is our basic frame made of maple saplings bent over and tied together using basswood bark and grape vine woven for added support. The secondary wall is the same general idea, but constructed very differently. The black circles represent large maple poles that were sunk 1-2 feet into the ground, theses poles are roughly 6 inches in diameter and range from 15-20 feet long. Once the poles are in and angled toward the center you can start to weave maple saplings in and out of the poles. As you start to weave your way up the hut it is important to have a higher concentration of saplings on the bottom where there will be the greatest weight and better chance for the mud to fall through the cracks. As you get higher on the wall you can start spacing the saplings out more and more. As you are building your second wall of saplings up you can start to add your mud or what ever insulating material you plan on using. This space between the walls is what makes this hut work, having that gap to trap air in and keep wind out is the reason why the warm air inside will stay in and the cold will stay out.

The final stages of construction

Got a lot of good work done this weekend. The mud is about 85% up the hut, only 1-2 more sheets of birch will be needed to cover the top all the way around. One more day of a few hours of
bucket hauling and i think we will be finished with the construction portion of the project. Once its all completed, we can start to finish up and tie in any loose ends. We still need to dig out the fire pit and get a few loads of pine needles for a little added comfort and any other decorating that needs to be done to make it nice and comfortable for winter!

Thursday, October 25, 2007

Making progress

here are some of the new pictures of how the hut is coming. the wall is about 4 feet all the way around. We also plugged up some holes with all the grass from the marsh.